Happy Saturday everyone,
Time has flown by since our first Skin Food feature. I hope you all enjoyed our pineapple, protein concoction. The creativity hasn’t stopped as we’ve been getting our chocolate on in the kitchen!
Our recipe this week is a delicious, sweet snack with a few added health benefits. It’s the perfect accompaniment to your afternoon coffee, and the secret skin nourishing ingredient is…. Avocado!
Yes… it’s usually the savoury favourite on the brunch menu alongside your poached eggs and toast, but this creamy fruit is extremely versatile; when mixed with the right ingredients it is perfect for satisfying your sweet tooth.
Avocados are packed full of vitamins and minerals – vitamins A, B, & E – to name only a few, therefore have tremendous benefits for your overall health. Altogether they provide a powerful skin boosting cocktail which leaves even the driest skin feeling hydrated and moisturised. Their omega 3 content especially is crucial for cell membrane health – essential fatty acids help produce the skin’s natural oil barrier. This is crucial for maintaining a plump, hydrated and youthful looking complexion.
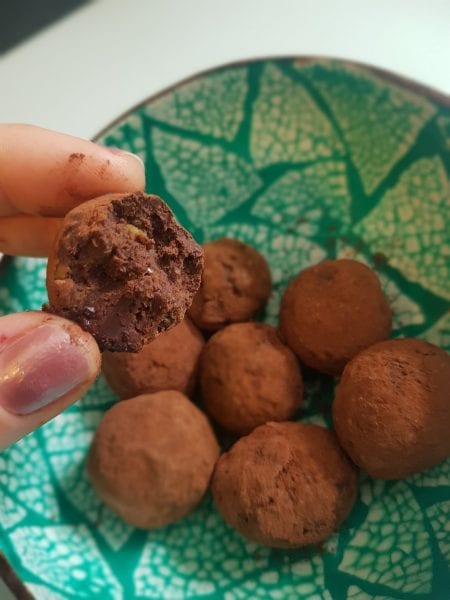
This weeks sweet snack – Dark chocolate & creamy avocado truffles!

Ingredients:
6 oz Dark chocolate (I used a 75% bar)
1 small medium avocado (roughly half a cup mashed)
1/2 teaspoon vanilla extract
1 tablespoon of natural peanut butter (optional)
A pinch of salt
2 tablespoons cocoa powder (optional – for coating the truffles)
Using Dark chocolate makes them extremely rich and creamy, with significantly less sugar. Also, switching to a dairy-free chocolate alternative will also make them vegan friendly! Additionally you can try sprinkling them with any super-food powder of your liking – macca powder is a great one to give an extra caramel flavour.
Method:
Step 1: Blend
Mix the avocado, sea salt & vanilla essence in a blender. If you don’t have one, you can mash the ingredients with a fork by hand (make sure the avocado is ripe for better flavour, texture and ease of mixing).
Step 2: Melt the chocolate
I like to heat it already in a glass mixing bowl rather than on the stove, simply so there are less pots to wash! However, this does require a little bit more attention. Be careful not to burn it. Heat the chocolate for roughly 20 seconds at a time, stopping to stir in between.
Step 3: Let them set!
Add the blended mixture to the melted chocolate until there are no lumps, then leave to harden in the fridge for around half an hour so they are easier to handle (if you are short on time then pop them in the freezer).
Step 4: Get hands on
All there is left to do is roll the chocolate mix into shape! The balls can be as big as you like (this mixture made approximately 16 little bites). Lastly role the balls in raw cocoa power, maybe add a little cinnamon for an extra taste and that is it…simple!
What next?
If you give it a try we would love to see! Tag us in your pictures on Facebook and Instagram. Also follow us to keep up to date with the latest beauty trends, tips and advise. For more ways to use Avocado at home on your skin read our Sunday Vibes post where Dr Ibrahim gives her favourite face and hair mask recipe!Keep an eye out for tomorrow’s Sunday vibes for more fuss-free beauty!